In This post i would like to present you the method to build a local data set and train them locally to detect object (Human) detection using Yolo V8. As i have explained in the Video I use ultralytics as Yolo V8 .
In order to obtain images to build your dataset from a local raspberry pi camera. You can use the python code below to take images from the camera every 5 second and save it to a local directory.
import cv2
import os
import time
import threading

class VideoStream:
    def __init__(self, url):
        self.cap = cv2.VideoCapture(url)
        self.ret, self.frame = self.cap.read()
        self.running = True
        self.thread = threading.Thread(target=self.update, args=())
        self.thread.start()

    def update(self):
        while self.running:
            self.ret, self.frame = self.cap.read()

    def read(self):
        return self.ret, self.frame

    def stop(self):
        self.running = False
        self.thread.join()
        self.cap.release()


# Set the directory where images will be saved
save_dir = r'C:\Users\49179\Documents\servolamp\servolamp2\Taken images'
os.makedirs(save_dir, exist_ok=True)

# Initialize the webcam (0 is the default webcam)
url = "http://192.168.x.x:8000/stream.mjpg"
stream = VideoStream(url)


# Set the image counter
img_counter = 898

print("Recording images every 5 seconds. Press 'q' to quit.")


while True:
        # Read a frame from the webcam
        ret, frame = stream.read()
        if not ret:
            print("Failed to grab frame")
            break
        # Display the frame (optional)
        cv2.imshow("Webcam", frame)

        # Define the image file name
        img_name = os.path.join(save_dir, f"image_{img_counter}.png")

        # Save the captured image
        cv2.imwrite(img_name, frame)
        print(f"{img_name} saved!")

        # Increment the image counter
        img_counter += 1

        # Wait for 5 seconds before capturing the next image
        time.sleep(5)

        # Check if the user wants to quit
        if cv2.waitKey(1) & 0xFF == ord('q'):
            print("Quitting...")
            break


# Release the webcam and close the window
stream.stop()
cv2.destroyAllWindows()
In the Next step you need to use an annotation tool to lable the object. In our Case the Object is Human, therfore, as i have explined in the Video you can use an Online tool such as CVAT.AI to do this Job. After exporting the labeled dataset you will get a zip file which contains three file and a folder like below:

and in the Obj_train_data folder you have many text file from the labeled images that look like as below:
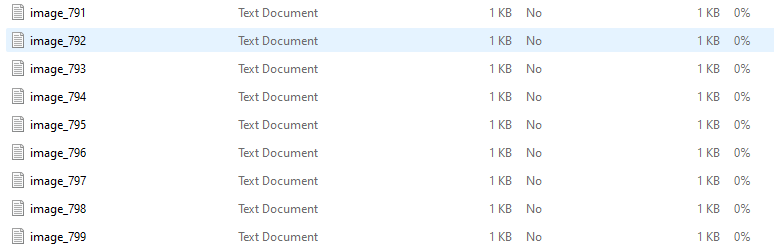
If you open the text file, you get the length and width and the center point of the rectangle of the labeled position in X and Y. The First 0 is representation of the Class which is here human.

To train your model you need a .Yaml config file.
path: 'C:\Users\49179\Documents\servolamp\servolamp2\data' #dataset root directory
train: images\train
val: images\train


#classes
names:
   0: human
And also you need to run this Code to start the training:
from ultralytics import YOLO


#load a model
model = YOLO("yolov8n.yaml")  #build a new model from scratch

#use the model
results = model.train(data="config.yaml", epochs=100)
for Epochs = 100, it takes some hours depending on you hardware, however i have tested the prompt below to use GPU instead of CPU, but i did not see any changes in the usage of my CPU which i do not know why!
python
Copy code
import torch

# Set the device (use 'cuda:0' for GPU 0 or 'cpu' for CPU)
device = torch.device('cuda:0' if torch.cuda.is_available() else 'cpu')

# Then move the model to the selected device
model.to(device)

# Continue with training
results = model.train(data="config.yaml", epochs=100)
Last but not least you need to run the Camera live and test your model on the Live capturing using the code below:
import os
from ultralytics import YOLO
import cv2

model_path = os.path.join(r'C:\Users\49179\PycharmProjects\face_recognitionv2', 'runs', 'detect', 'train5', 'weights', 'last.pt')
# Load a model
model = YOLO(model_path)  # load a custom model
auto_camera = "http://192.168.x.x:8000/stream.mjpg"
video_capture = cv2.VideoCapture(auto_camera)

while video_capture.isOpened():
    ret, frame = video_capture.read()  # Capture frame-by-frame from the camera
    if not ret:
        break

    # Perform inference on the frame
    results = model(frame)

    # Visualize the results (optional)
    annotated_frame = results[0].plot()  # YOLOv8 provides built-in visualization

    # Show the frame with detection
    cv2.imshow('YOLOv8 Detection', annotated_frame)

    # Press 'q' to quit the window
    if cv2.waitKey(1) & 0xFF == ord('q'):
        break

# Release the camera and close all windows
video_capture.release()
cv2.destroyAllWindows()
I hope that you enjoyed this post, please do not forget to subscribe and support me for more interesting blog post.

Support
Please support me to provide content on this Blog. Thank you
€1.00


Leave a comment